How to Apply False Lashes Without Glue: Why You Should Reconsider

Delcina Brown
August 16, 2026
Makeup

If you have been searching for how to apply false lashes without glue, you are in good company. Glue has a reputation for being messy, unpredictable, and stressful, and a lot of people decide early on that there has to be a better way. The truth is, there is not. But the even better truth is that glue is nowhere near as difficult as it seems once you know what you are actually doing.

This post covers:

  • Why so many people want to skip glue and why that instinct makes sense
  • What glue-free alternatives actually deliver (and where they fall short)
  • Why glue gives you results that other methods simply cannot match
  • What makes glue feel scary and how to get past it
  • A clean, beginner-friendly process for using glue without the mess
  • How to choose the right glue for your skill level
  • A full step-by-step application walkthrough
  • The most common glue mistakes and exactly how to fix them

By the end, you will have everything you need to give glue a real, confident try, possibly for the first time.

Why People Want to Skip Glue in the First Place

Before getting into why glue is worth learning, it is worth acknowledging why so many people want to avoid it.

Maybe you tried it once and ended up with a stringy white mess along your lash line. Maybe the lash slid around while the glue was wet and you could not get it to sit right. Maybe you are worried about getting adhesive near your eye and the whole thing just feels like a risk you would rather not take.

These are all completely valid reactions. False lash glue has a learning curve, and when you hit that curve without any guidance, it feels worse than it actually is. The problem is that most people chalk up a bad first experience to glue being inherently difficult rather than to not yet knowing the technique. So they go looking for a workaround instead of a fix.

That is where the search for glue-free options comes from, and it makes total sense. But here is where things get interesting.

The Problem with Going Glue-Free

Glue-free false lash options have genuinely improved over the past few years. Self-adhesive lashes, adhesive liner systems, and double-sided lash tape are all widely available and heavily marketed as easier alternatives. For some people, in some situations, they work fine.

But here is the honest picture:

  • Self-adhesive lashes use a pre-applied sticky strip on the lash band. The adhesion tends to be lighter than traditional glue, which means corners lift more easily, especially toward the end of a long day.
  • Adhesive liner works better than self-adhesive strips, but the liner needs to be applied precisely and allowed to get tacky before the lash is pressed down. Sound familiar? It is essentially the same process as using glue, just with a different product.
  • Lash tape is mostly a short-term fix. It is not designed for all-day wear and rarely survives humidity, heat, or an emotional moment.

The irony is that most glue-free methods still require the same core skills as traditional glue application: patience, precision, and waiting for the adhesive to reach the right stage before placing the lash. They just tend to deliver a weaker hold and a less polished finish in exchange.

If the goal is false lashes that stay put and look seamless, glue is still the standard.

Why Glue Gives You Better Results

Traditional lash glue has been the industry standard for decades for straightforward reasons. It creates a stronger bond than any adhesive strip or liner alternative, it gives you more time to adjust placement before it sets, and when it dries clear or black along the lash line, it disappears completely.

More importantly, glue gives you control. You decide how much to apply, exactly where to place the lash, and how long to wait before pressing it down. That level of precision is what makes a false lash look like it genuinely belongs on your face.

Here is the part that changes everything for most people: the majority of bad glue experiences are not glue problems. They are technique problems. Too much glue, not enough wait time, pressing the lash down while the adhesive is still wet. These are all fixable habits, not permanent obstacles. Once you adjust the technique, the glue stops being the enemy and starts being the tool that actually gets the job done.

The Real Reason Glue Feels Scary (And Why It Does Not Have to Be)

When you break down what actually feels intimidating about lash glue, it usually comes down to three moments:

Applying the glue. People either squeeze out too much or apply it unevenly along the band. Both are easy to fix with a small adjustment in how you handle the tube.

Waiting for it to get tacky. This is the step most beginners rush, and it is the one that causes the most problems. Wet glue slides. Tacky glue grips. The 30 to 60 second wait feels awkward when you are new to it, but it is the single most important pause in the entire process.

Placing the lash. Once the glue is tacky, people panic about getting it in the right position before it sets. This is understandable but unnecessary. Tacky glue still gives you a few seconds to adjust. You have more time than you think.

None of these moments are as high-stakes as they feel in the moment. They are just unfamiliar. And unfamiliar becomes familiar very quickly once you have done it a few times.

How to Use Lash Glue Without the Mess or Stress

A few simple habits make the whole glue process cleaner and calmer.

  • Use less than you think you need. A thin, even coat along the band is all you need. More glue does not mean better hold. It means more mess and a longer dry time.
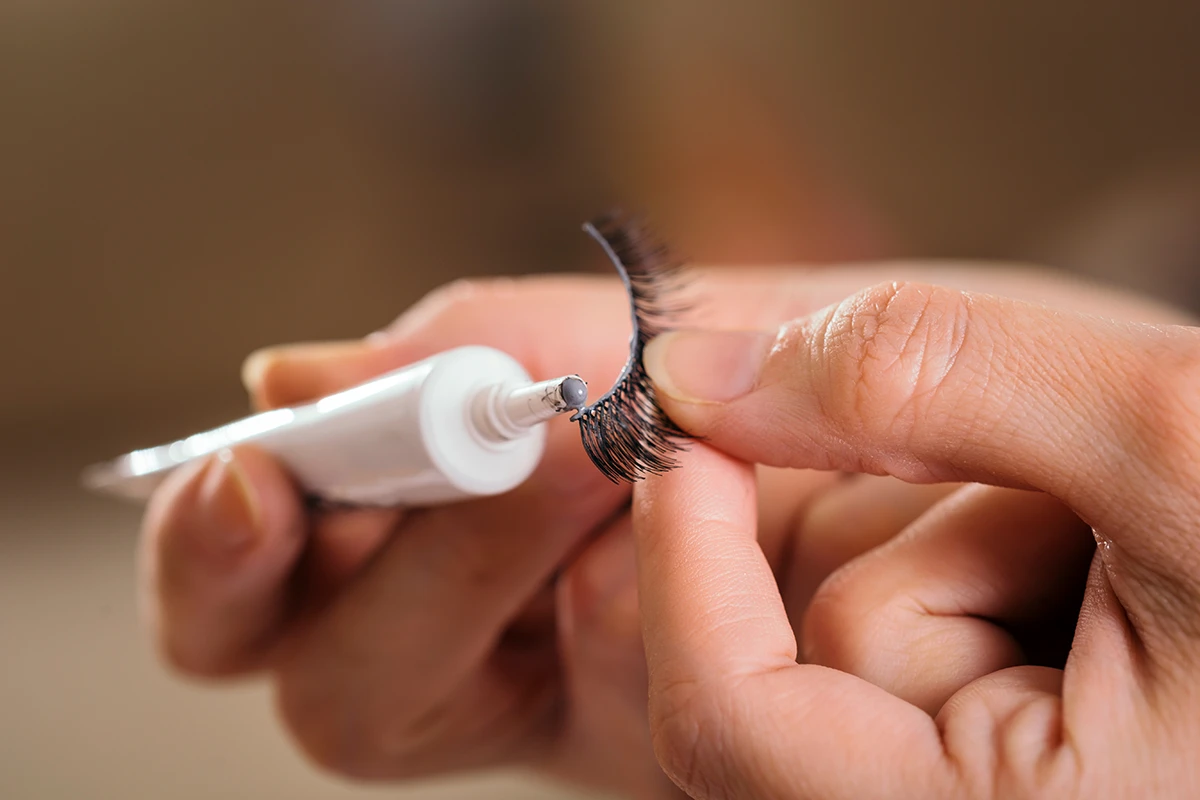
  • Apply glue with a precision tool. Instead of squeezing directly from the tube onto the lash band, squeeze a small dot onto the back of your hand or a clean surface, then use a toothpick or thin brush to paint it onto the band. This gives you far more control.
  • Set a timer for the wait. It sounds overly simple, but counting to 45 out loud or setting a 45-second timer removes the guesswork and stops you from rushing.
  • Work at eye level. Position your mirror so you are looking straight ahead, not tilting your head back. This gives you the clearest view of your lash line and makes placement much easier.

These small adjustments take the chaos out of the process and make the whole thing feel manageable from the first try.

Choosing the Right Glue for Beginners

Not all lash glues are equally beginner-friendly, and choosing the wrong one can make the process harder than it needs to be.

  • Clear-drying glue is the most forgiving option for beginners. It dries transparent, so any small placement imperfections along the lash line are less visible. It also shows you the tackiness stage clearly as it transitions from white to clear.
  • Black glue dries dark and can double as a liner, which is great for a more defined look. It is slightly less forgiving for beginners because placement needs to be precise, but it saves a step if you plan to line your eyes anyway.
  • Latex-free glue is worth choosing if you have sensitive eyes or skin, or if you are simply not sure whether you have a latex sensitivity. It performs comparably to traditional formulas and is widely available.
  • Brush-on glue comes with a built-in applicator wand, which eliminates the need for a toothpick or separate brush. Many beginners find this the easiest format to work with straight out of the package.

Start with a clear-drying, latex-free formula if you are building confidence. Once the process feels natural, you can experiment with other types.

Step-by-Step: How to Apply False Lashes with Glue the Right Way

Here is the full process from start to finish.

  1. Size the lash. Hold the strip up to your eye before applying any glue. The lash should start where your natural lash line begins and end where it ends. If it overhangs at either corner, trim from the outer edge until it fits.
  2. Apply glue to the band. Using a toothpick, thin brush, or brush-on applicator, paint a thin, even layer of glue along the full length of the lash band.
  3. Wait. Set a timer for 45 seconds. Do not skip this. The glue needs to go from wet and white to tacky and slightly translucent before you place the lash.
  4. Position the lash at the center first. Looking straight into your mirror, place the center of the lash strip onto the center of your lash line. This anchors the lash before you work outward.
  5. Press down the inner corner, then the outer corner. Use your fingertip or a pair of tweezers to press each end down firmly against your lash line.
  6. Run your finger along the full band. A gentle press along the entire length of the band ensures full contact and eliminates any lifted sections.
  7. Blend and finish. Apply a coat of mascara to merge your natural lashes with the strip, then run a thin line of eyeliner along the band to conceal it completely.

That is the whole process. Seven steps, most of which take only a few seconds each.

Common Glue Mistakes and How to Fix Them

These are the errors that trip people up most often, and every single one is correctable.

  • Too much glue: Results in a stringy, visible mess along the lash line. Fix: use a precision tool and apply a thin coat, not a thick one.
  • Not waiting long enough: The lash slides around and will not sit in the right place. Fix: wait the full 45 seconds before touching the lash to your eye.
  • Trying to reposition after the glue has fully set: The lash lifts or the bond breaks. Fix: work quickly once you place the lash and make adjustments within the first few seconds, before the glue locks in.
  • Starting placement at the inner corner: This almost always leads to a crooked lash. Fix: always anchor the center first.
  • Skipping the finishing liner: The band remains visible and the lash looks obviously fake. Fix: always trace a thin line of liner over the band as the last step.

Conclusion

Searching for how to apply false lashes without glue makes complete sense when glue has felt like the problem. But in most cases, glue is not the problem. Technique is. And technique is something you can learn, adjust, and improve every single time you practice.

Give glue one more honest try using the steps and habits in this guide. Start with a clear-drying formula, use a precision applicator, wait the full 45 seconds, and anchor the center first. You may find that the thing you have been trying to work around was never really an obstacle at all.

If you want hands-on guidance from a professional, our Makeup and Hair Classes in Columbus, Ohio are the perfect place to build your confidence and get real-time feedback on your technique.


About the author

Delcina Brown

Delcina Brown is the founder and CEO of 614 Beauty, with over 25 years of experience in makeup artistry. Known for her classic, modern approach to enhancing natural beauty, she has worked with Chanel, celebrities, and across television, fashion, and bridal industries.
Learn More
Our latest

Blog posts

Beginner applying thin layer of lash glue to false lash band.
August 16, 2026

How to Apply False Lashes Without Glue: Why You Should Reconsider

How to apply false lashes without glue? We get it. But glue wins every time. Learn why and how to use it without the mess or stress.
Woman receiving an eyelash cluster application.
August 14, 2026

How to Apply Eyelash Clusters for a Natural Look

How to apply eyelash clusters for a natural finish. Learn placement strategy, blending tips, and the mistakes that make clusters look fake.